
An introduction to Jekyll
![]()
Jekyll is a lightweight static site generator. It takes the raw form of your web content from simple text files and puts them through a markdown converter and template engine to produce static pages suitable for just about any web server.
It is described as being ‘blog aware’ which means that if you put your posts in a specific folder and follow a particular naming convention, then Jekyll can produce everything you need for publishing your blog.
There is plenty of information around on getting your blog set up quickly and easily with Jekyll, which is all well and good but if you want to use it for more than just your blog content or if you’d just like to understand a bit more about how it works, then you’re going to want to dig into it a bit deeper.
The easiest way to install Jekyll is via RubyGems. If you are installing Jekyll on Windows you may also find the instructions here useful.
The Basics
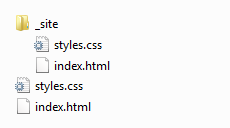
At its most basic level Jekyll will simply copy your web content files directly to its output. So, if you had a folder with a simple HTML file called ‘index.html’ and some css in ‘styles.css’, for example…
index.html:
<!DOCTYPE html>
<html lang="en" xmlns="http://www.w3.org/1999/xhtml">
  <head>
    <link rel="stylesheet" type="text/css" href="styles.css" />
  </head>
  <body>
    <h1>Hello, Jekyll!</h1>
  </body>
</html>
styles.css:
body {
  font-family: 'Myriad Pro', Calibri, Helvetica, Arial, sans-serif;
  color: Red;
}
…and then ran the Jekyll command from that folder…
Ian Reah@IANREAH-PC ~/documents/jekyll
$ jekyll
WARNING: Could not read configuration. Using defaults (and options).
  No such file or directory - c:/Users/Ian Reah/documents/jekyll/_config.yml
Building site: c:/Users/Ian Reah/documents/jekyll -> c:/Users/Ian Reah/documents
/jekyll/_site
Successfully generated site: c:/Users/Ian Reah/documents/jekyll -> c:/Users/Ian
Reah/documents/jekyll/_site
…you would see a new _site folder created containing a copy of the two files. (We’ll come back to that warning about no config file.)
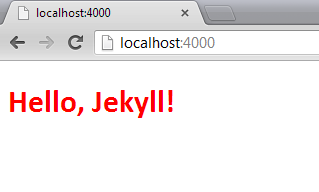
The idea is that the output in the _site folder contains your entire site in a form that can be uploaded straight to your web server. To test your site locally first, just run the jekyll command with the --server option. This will start a simple web server on port 4000.
Ian Reah@IANREAH-PC ~/documents/jekyll
$ jekyll --server
WARNING: Could not read configuration. Using defaults (and options).
  No such file or directory - c:/Users/Ian Reah/documents/jekyll/_config.yml
Building site: c:/Users/Ian Reah/documents/jekyll -> c:/Users/Ian Reah/documents
/jekyll/_site
Successfully generated site: c:/Users/Ian Reah/documents/jekyll -> c:/Users/Ian
Reah/documents/jekyll/_site
[2012-12-23 12:58:18] INFO  WEBrick 1.3.1
[2012-12-23 12:58:18] INFO  ruby 1.9.3 (2012-04-20) [i386-mingw32]
[2012-12-23 12:58:18] INFO  WEBrick::HTTPServer#start: pid=8856 port=4000
Then you can test your site by browsing to http://localhost:4000/
Writing your content in Markdown
Ok, so maybe copying files over to a different folder for uploading to your web server isn’t all that useful. Of course, there’s more to Jekyll than that. For a start there’s that markdown converter I mentioned earlier…
With markdown you can create your content using a much more lightweight and less verbose syntax. Then you can use Jekyll to generate the raw HTML for your site.
Now, if you had a folder with your web content in markdown files and ran the Jekyll command from that folder it would just copy the markdown files directly to the output folder as it did with the HTML example we saw earlier.
To tell Jekyll that the file requires processing before being copied then the file needs to begin with a YAML front matter block. A YAML front matter block is surrounded by triple-dashed lines. We’ll look at what sorts of things you can define within the YAML front matter block later, but for now an empty block is enough to tell Jekyll to process the markdown files through its converter.
For example, if you replaced the ‘index.html’ file from the earlier example with an equivalent markdown file containing the empty YAML front matter block at the start…
index.md:
---
---

# Hello, Jekyll! #
…and ran the Jekyll command again then this time, rather than simply copying the markdown file, you’d get an index.html file in the _site output folder containing the processed markdown.
If you test the site with the Jekyll --server option you’ll see the output from the processed markdown file is almost identical to our first example with the raw HTML file.
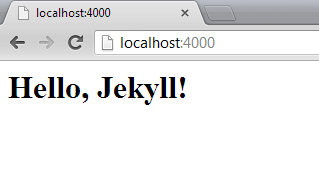
As you’ve probably already worked out, the reason it doesn’t look exactly like the output from the first example is that we’ve lost the link to the stylesheet. In the next section, we’ll look at using layouts to get that back.
Introducing Layouts
In Jekyll layouts are written using the Liquid templating language and stored in the _layouts subfolder. The layout to use for a particular file is specified in the file’s YAML front matter, as shown below…
index.md:
---
layout: mylayout
---

# Hello, Jekyll! #
The layout to use for this page would then be defined in a ‘mylayout.html’ file and placed in the _layouts folder. The {{ content }} tag is used to inject the page content into the layout. For example, the layout shown below can be used to place the processed content from our markdown into an HTML page containing a link to our stylesheet…
_layouts\mylayout.html:
<!DOCTYPE html>
<html lang="en" xmlns="http://www.w3.org/1999/xhtml">
  <head>
    <link rel="stylesheet" type="text/css" href="styles.css" />
  </head>
  <body>
    {{ content }}
  </body>
</html>
As you’d expect from a templating system, the Liquid markup language provides syntax for defining logic in your templates including conditional and looping logic. For more information see the reference here.
Jekyll Configuration
The configuration options for your site can be specified in a _config.yml file in the site’s root directory. Creating _config.yml will get rid of that warning we’ve been getting from Jekyll when building the site, and opens up a whole host of configuration options. Adding auto: true to this file is a very useful option for ongoing development, because it will then watch for file changes and automatically rebuild your site. This means you can edit your site content, save the changes and refresh your browser to see the effect.
(Note that even with the auto: true option, changes to the _config.yml file will not be automatically picked up. If you change any options, you need to stop and restart the server after saving the changes.)
Check here for a list of the configuration options and details of the default configuration.
You can also set various configuration options on a page by page basis in the file’s YAML front matter block. We’ve already seen the use of the layout option for specifying which template to use for the page. Details of the other page options are available here.
The most powerful aspect of the Jekyll configuration is that, as well as the predefined options, you can also add custom configuration data. This can be defined at both the site level (by adding custom options to the _config.yml file) and at the page level (by adding custom options to a file’s YAML front matter).
All of the configuration data is made available to the templating engine during conversion. The site level data from the _config.yml can be accessed from a layout template through the site variable. Similarly, the page level data from each file’s YAML front matter is available from a layout template through the page variable. See here for more details.
Bringing it together
Hopefully you should now be beginning to see the power of Jekyll. The ability to maintain your site content using the lightweight markdown language and combine the conversion of the markdown with the Liquid template engine and flexible template data configuration enables you to ‘concoct your sites in any way you can dream up’!
As a simple worked example, try adding some custom data to the _config.yml to specify details of the pages to include in the site’s navigation area…
_config.yml:
navigable-pages:
  - title: home
    url: /index.html
  - title: projects
    url: /projects.html
  - title: about
    url: /about.html
…and then update the markdown file to add some title and date information to the YAML front matter block…
index.md:
---
layout: mylayout
title: An introduction to Jekyll
date: 2012-12-27 16:16:00
---

Hello, Jekyll!
Now, the data we added to the _config.yml will be made available from the layout templates as site.navigable-pages and the data we added to the markdown file’s YAML front matter block will be available in the page.title and page.date variables. We can then extend our previous template to build a navigation menu and include the page title and date before the main content…
_layouts\mylayout.html:
<!DOCTYPE html>
<html lang="en" xmlns="http://www.w3.org/1999/xhtml">
  <head>
    <link rel="stylesheet" type="text/css" href="styles.css" />
  </head>
  <body>
    <header>
      <ul id="menu">
        {% for node in site.navigable-pages %}
          <li><a href="{{ node.url }}">{{ node.title }}</a></li>
        {% endfor %}
      </ul>
    </header>
    <h1>{{ page.title }}</h1>
    <p>{{ page.date }}</p>
    <hr />
    {{ content }}
  </body>
</html>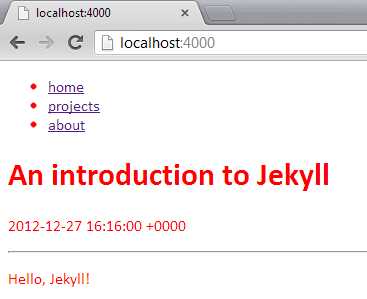
Of course, you’re going to want to spend a bit more time with the styling but you get the idea!
Summary
- At its most basic level, Jekyll simply copies your site files to its output, the _site folder.
- Any file containing a YAML font matter block at the start of the file will be processed first.
- A file or folder beginning with an underscore (_) will not be included as part of the site.
- Jekyll treats some files and folders as special data used in the generation of the site. (We’ve seen the special _config.yml file and _layouts folder. For a description of the other special files and folders see here.)
- The site is generated by running the
Jekyllcommand. The generated _site folder can then be uploaded straight to your web server. - You can test the site locally by using the
--serveroption. Add theauto: trueoption to the _config.yml to aid ongoing development and local testing. - Layouts are written in the Liquid templating language and the layout to use for a file is defined in its YAML front matter block using the
layoutoption. - Any site-wide configuration options specified in the _config.yml file are made available from the layouts via the
sitevariable. - Page-specific configuration options included in the page’s YAML front matter are available from the layouts via the
pagevariable. - As well as any predefined options, the _config.yml file and YAML front matter blocks can include any custom data.
Obviously, the information outlined here will only give you the very basics for a site. There’s still a lot to consider, such as enabling comments on your posts, adding search capabilities, and an RSS feed, etc. There can be no denying that maintaining a site this way requires more work compared to using a more feature rich CMS or blogging tool. Personally, though, I am enjoying the flexibility, challenges and satisfaction of having much more control over the site.
If you’re still interested in knowing more there’s an excellent step-by-step tutorial here which goes into some of the more finer details of building a site with Jekyll.
comments powered by Disqus
About
I work as a Software Developer at Nonlinear Dynamics Limited, a developer of proteomics and metabolomics software.
My day job mainly involves developing Windows desktop applications with C# .NET.
My hobby/spare-time development tends to focus on playing around with some different technologies (which, at the minute seems to be web application development with JavaScript).
It’s this hobby/spare-time development that you’re most likely to read about here.
Ian Reah